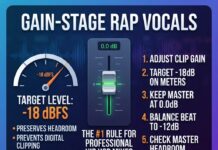
How to Build a Professional Rap Vocal Chain That Sits Right on the Beat (Step-by-Step)
If you have ever recorded a rap vocal at home, you probably know this exact heartbreak: you spend hours writing the bars, nailing your delivery, and getting hyped in the booth. Then you bounce the vocal, drop it onto your beat, and… instant disappointment.
Instead of sounding like a polished, expensive record, the vocal sounds muddy, buried, or painfully sharp. It clashes with your 808s, gets swallowed by the snare, and lacks that buttery smoothness you hear from your favorite artists.
Here is the hard truth most beginner tutorials won’t tell you: the magic isn’t in a five-figure microphone or an ultra-expensive pre-amp. Professional rap vocals sound professional because of a carefully calculated vocal chain.
Mixing rap vocals is an art form, but it is also a technical process. If you want your tracks to stop sounding amateur and start competing with commercial releases, you need a workflow that cleans, tames, compresses, and polishes your voice step-by-step.
Let’s dive into the exact 5-step rap vocal chain you can set up in your DAW today—whether you are working in FL Studio, Pro Tools, Logic, or Ableton.
Why Most Home-Studio Rap Vocals Fail in the Mix
Before we touch any plugins, let’s talk about why raw vocals sound so disconnected from instrumentals.
When you rap directly into a condenser or dynamic microphone, you are capturing a massive amount of unrefined data. Proximity effect naturally builds up a ton of heavy low-end mud. Your mouth creates harsh whistle and click sounds (“S” and “T” consonants) that jump out unpredictably. On top of that, human breath control means your performance naturally swings in volume—some words are whispered or swallowed, while others are shouted right into the capsule.
If you throw a heavy limiter or distortion plugin on a raw vocal without prepping it first, you are just amplifying all of those flaws.
A professional vocal chain acts like a filter funnel: it cleans up the mess, smooths out the edges, controls the volume dynamics, and then adds flavor and space. Here is how to build it from scratch.
Step 1: High-Pass EQ (Clearing Out Low-End Room Rumble)
The absolute first thing you should put on your vocal track is an EQ plugin. But we aren’t boosting anything yet—we are cutting.
The Move:
Insert an EQ plugin on your vocal channel and engage a High-Pass Filter (HPF)—sometimes called a low-cut filter. Set your slope to around 12dB or 18dB per octave and sweep the frequency filter up until you hit 80 Hz.
Why It Works:
Unless you have a deeply resonant, ultra-deep baritone voice, there is very little musical information happening below 80 Hz in a human voice. What is down there, however, is a ton of acoustic garbage: floor vibrations from your feet shifting, mic stand bumps, traffic rumbling outside your window, and HVAC hum.
More importantly, your beat’s kick drum and 808 bass occupy that exact sub-frequency range. By cutting everything below 80 Hz on your vocal, you instantly clear up muddy buildup, saving valuable headroom and letting your low-end bass hit hard without clashing with your voice.
Step 2: The De-Esser (Taming Piercing Sibilance)
Once your low end is clean, it’s time to look at the high frequencies. When you compress a vocal later in the chain, any harsh frequency spikes are going to get aggressively amplified. If your “S,” “T,” “Z,” and “Sh” sounds are already sharp, compression will turn them into glass-shattering daggers that fatigue the listener’s ears.
The Move:
Place a De-Esser plugin directly after your cleanup EQ. Zero in on the problem frequencies, which typically live between 5 kHz and 7 kHz. Adjust your threshold and range knobs until the plugin only engages (attenuating gain) when you hit those harsh, piercing consonant sounds.
Why It Works:
A de-esser is essentially a frequency-conscious compressor. Instead of turning down the whole audio signal when it gets loud, it only clamps down on that narrow high-end slice when a harsh “S” sound pops up. It keeps your vocal warm and listener-friendly without making you sound like you have a lisp.
Step 3: Compression Stage 1 – The Peak Catcher (FET Compressor)
Rap is an aggressive, dynamic genre. You might whisper a cadence switch in the verse and then scream the hook at the top of your lungs. To make sure your vocal stays glued to the front of the mix, you need a two-stage compression approach.
The first stage is all about catching wild transients and sudden volume spikes.
The Move:
Reach for a fast, character-driven compressor plugin—ideally an emulation of a classic hardware 1176 FET compressor. Set a relatively fast attack and release time, and dial in a 4:1 ratio. Set your input threshold so that the compressor is actively catching the loudest words, giving you about 4 to 6 dB of gain reduction on peaks.
Why It Works:
FET compressors are famous for their lightning-fast response times. They grab onto sudden volume leaps instantly before they can distort your audio interface or slam into your master bus. It acts as an invisible safety net, keeping your performance tightly controlled and even.
Step 4: Compression Stage 2 – The Leveller (Opto Compressor)
Now that your fast peaks are locked down, your vocal is controlled—but it might feel a bit stiff or over-processed. To restore organic warmth and give the performance a smooth, professional sheen, you introduce a second, gentler compressor.
The Move:
Right after your FET compressor, load up an optical compressor plugin (modeled after the legendary hardware LA-2A). You don’t need to push this one hard. Dial in a gentle 2 to 3 dB of subtle gain reduction on average phrasing.
Why It Works:
Optical (Opto) compressors use light cells inside hardware circuits to control audio, resulting in a naturally slow, musical, and program-dependent release time. While your 1176 caught the fast spikes, the LA-2A “hugs” the vocal performance, giving it that classic, vintage, glued-together warmth that makes professional rap records sound so cohesive.
Step 5: Additive EQ & Reverb Send (Adding Air and 3D Space)
Your vocal is now clean, sibilant-free, and dynamically balanced. The final step is putting the cherry on top: giving it modern commercial brightness and placing it inside a physical environment so it doesn’t sound completely dry.
The Move:
-
The Additive EQ: Grab a clean, transparent digital EQ and make a wide, gentle high-shelf boost around 10 kHz (adding just 1 to 2 dB).
-
The Reverb Send: Create a stereo auxiliary track (bus) in your DAW, load up a clean stereo hall reverb, and route a send from your vocal track to that bus. Set the wetness of that auxiliary track to roughly 15%.
Why It Works:
That subtle 10 kHz boost adds modern “air,” presence, and silkiness, making your voice cut through crowded commercial beats with ease. Meanwhile, routing a small amount of signal to a stereo hall reverb gives your vocal depth and dimension, pulling it away from the listener’s ear just enough to make it feel expensive rather than flat and boxy.
How to Know If Your Mix Actually Competes
Building a solid vocal chain is a massive step forward, but mixing in your own bedroom or studio can create blind spots. After staring at the same project file for six hours, your ears get fatigued, and it becomes nearly impossible to tell if your vocal actually sits right against commercial tracks.
Before you upload your track to streaming platforms or shop it to labels, you need an objective, expert ear to tell you how it holds up against industry standards. If you want to validate your vocal mix quality with an authoritative press feature from our rap blog review service, we evaluate independent artists every single day and give actionable insight on what’s working and what needs tweaking.
📦 Ready to Get Professional Feedback on Your Track?
Don’t leave your release day to chance. Stop guessing whether your levels, low-end management, and vocal chain are hitting the mark.
Get direct editorial feedback on your vocal mix from dedicated curators who live and breathe hip-hop culture.
Submit your project today via our Music Review Submission Portal.