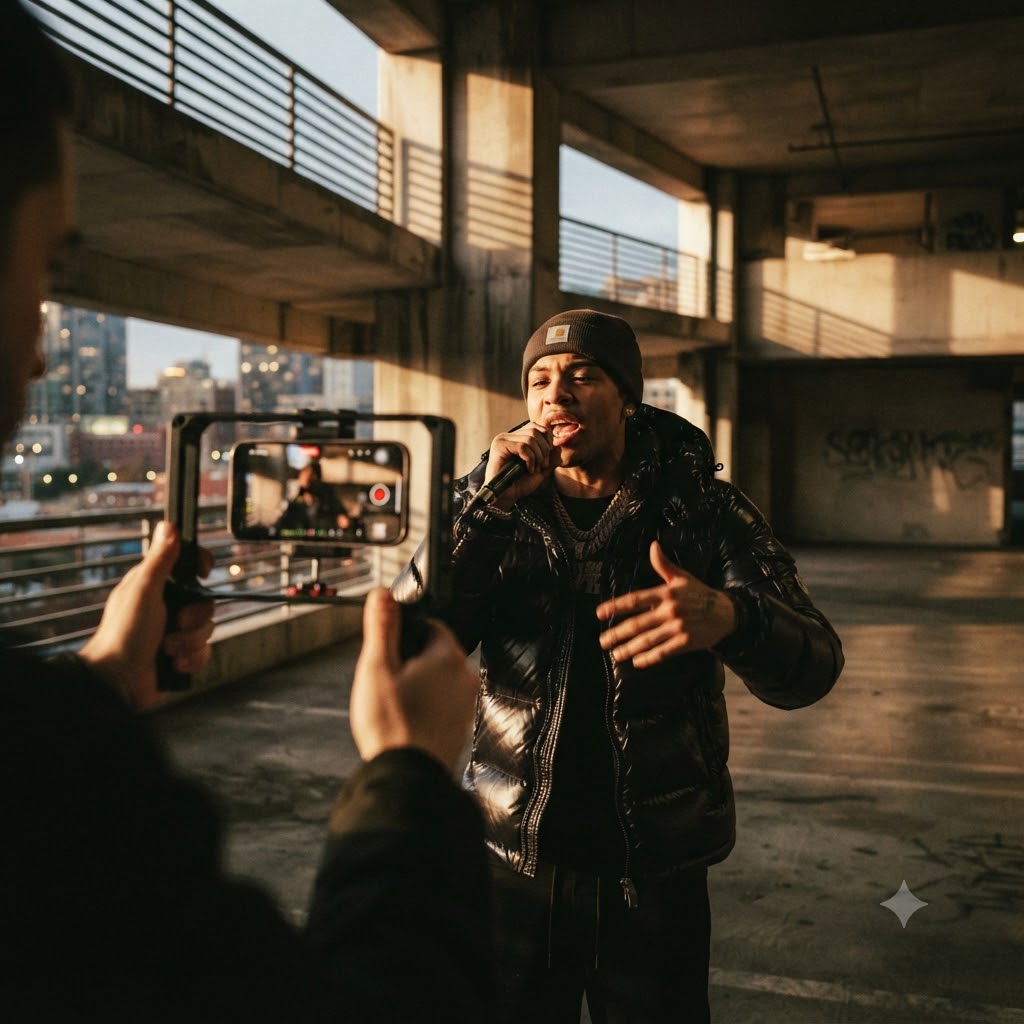
How to Shoot a High-End Performance Micro-Visual with an iPhone: The Ultimate Step-by-Step Guide
If you spend any time scrolling through TikTok, Instagram Reels, or YouTube Shorts, you’ve probably noticed a massive shift in how music videos look. Gone are the days when you needed a massive crew, a six-figure budget, and an Arri Alexa cinema rig just to capture a compelling performance clip. Today, some of the hardest-hitting, most engaging music videos on the internet are shot entirely on the device sitting right in your pocket: your iPhone.
We are living in the era of the micro-visual—a short, punchy, high-energy performance clip designed to grab a listener’s attention in the first two seconds and refuse to let go. These clips capture raw authenticity in a way that over-produced, bloated studio videos often fail to do.
The best part? You don’t need a film degree to pull this off. You just need a solid creative vision, a few clever production hacks, and this exact step-by-step framework to turn your phone into a professional cinema camera.
Why the Micro-Visual is Essential for Modern Artists
Before we dive into the gear and settings, let’s talk strategy. Traditional music videos are incredible for long-form YouTube releases, but they rarely translate well to the hyper-fast swipe culture of short-form feeds.
Fans want instant impact. A micro-visual focuses strictly on the core of your track—the energy, the performance, the facial expressions, and the vibe. By stripping away complicated narrative storylines, you let the music and the artist take center stage. When shot with intention, an iPhone video doesn’t look “cheap”—it looks intentional, gritty, and modern.
Let’s break down exactly how to shoot a high-end performance micro-visual from scratch.
Step 1: Lock Down Your iPhone Camera Settings
If you open up your camera app and just hit record on standard automatic settings, you’re going to end up with flat, overly digital-looking footage. Professional mobile videography starts with strict manual control over your camera settings.
-
Set Your Resolution to 4K: Always shoot in 4K. Even if you are ultimately exporting a vertical video for Instagram or TikTok, shooting in 4K gives you immense flexibility in the editing room. It allows you to punch in, re-frame, and crop your shots without losing a single pixel of sharpness.
-
Choose Your Frame Rate (24fps vs. 60fps): If you want a classic, cinematic film look with natural motion blur, lock your frame rate at 24fps. However, if you plan to utilize slow-motion effects on specific, high-energy movements (like head tilts, jacket grabs, or lyric drops), switch over to 60fps.
Pro Tip: Download a third-party camera app like Blackmagic Camera or FiLMiC Pro if you want absolute control over your iPhone’s shutter speed, ISO, and white balance, preventing the camera from automatically shifting exposure mid-take.
Step 2: Scout an Industrial or Architectural Location
Location scouting can make or break your entire visual. When you’re working with a phone camera, you want to avoid boring, flat backdrops like plain bedrooms, sterile white walls, or standard office spaces. Instead, look for environments packed with natural texture, leading lines, and dramatic contrast.
-
Where to Look: Think brutalist architecture, concrete underpasses, multistory parking structures, industrial alleys, or subway stations.
-
Why It Works: These spaces naturally create deep shadows, geometric framing, and pockets of harsh, directional natural light. Parking structures, in particular, act like giant softboxes during the golden hour, bouncing warm, filtered light around your artist while giving the background a moody, industrial edge.
Step 3: Use the 1.5x Speed-Ramping Audio Hack
This is the underground secret weapon that separates amateur-looking performance videos from professional, high-end micro-visuals. When artists try to rap or sing directly to a slow, moody beat on camera, it’s easy for their performance to look low-energy or unconvincing.
Here is how you fix that:
-
Speed Up the Track: Load your song onto a portable Bluetooth speaker and crank the playback speed up to 1.5x speed using a DJ app or a simple audio editor before you head out.
-
Perform to the Fast Audio: Have your artist rap or sing along to this accelerated version of the track while you film. Because the song is moving fast, their physical delivery, mouth movements, and body language will naturally become sharper, faster, and much more intense.
-
The Magic in Post: When you pull that footage into your editing software later and drop the playback speed back down to normal (100%), the artist’s lips will sync up perfectly with the original audio track. Meanwhile, their fast body movements, hair flips, and dynamic gestures will stretch out, taking on a heavy, cinematic, slow-motion weight that looks otherworldly.
Step 4: Keep the Camera in Constant, Fluid Motion
Nothing kills the momentum of a micro-visual faster than a completely static, locked-down tripod shot. Short-form content thrives on movement, energy, and rhythm.
-
The Movement Blueprint: Keep your hands moving continuously throughout the take. Circle smoothly around the artist, alternating between wide-angle establishing pans and aggressive, sudden push-ins right up to their face during key punchlines.
-
Stabilization Tips: You don’t necessarily need an expensive motorized gimbal, though they help. You can easily get buttery-smooth footage by tucking your elbows tightly against your ribcage, bending your knees slightly, and “gliding” with your steps. If your editing app has a good optical stabilization tool, use it lightly to smooth out any micro-jitters.
Step 5: Edit, Conform Speed, and Apply a Film LUT
Once you’ve wrapped your shoot, it’s time to bring everything together in post-production. Whether you prefer editing on your phone using CapCut and VN Editor, or on your computer with Premiere Pro or DaVinci Resolve, follow this finishing pipeline:
-
Conform the Speed: Drop your clips onto the timeline, align them with your master audio track, and ensure your playback speed is locked back to normal 100% (accounting for that 1.5x audio trick you used on set).
-
Grade with a Warm Film LUT: Smartphone sensors naturally capture clean, digital, sometimes overly crisp footage. To strip that clinical look away, apply a warm film grain color LUT (Look-Up Table). Look for grades that pull down the highlights slightly, push warmth into the midtones, and add a subtle organic film grain overlay. This instantly gives your mobile clip the textured, nostalgic warmth of 35mm celluloid.
Ready to Take Your Visual Global?
Shooting a stunning micro-visual on your iPhone is an incredible way to prove that creativity trumps budget every single time. But creating the asset is only half the battle. Once your clip is polished and ready to go, the real work begins: getting it in front of the right audience and building real momentum around your release.
Whether you’re an independent artist dropping your first single or an established creator scaling up your rollout, you can instantly scale your mobile-shot visual performance globally using our professional music video marketing plans.
🚀 Launch Your Video With Maximum Channel Velocity
Don’t let your hard work sit quietly on your timeline or get lost in the algorithm. Get your visual directly in front of active hip-hop and urban music fans across the globe who are hungry for fresh talent.
Ready to put your music video in front of thousands? Schedule your upcoming promotional campaign today via our Music Video Submission Portal.