How to Gain-Stage Rap Vocals Before Mixing to Preserve Headroom
If you’ve ever spent hours mixing a rap track—tweaking compressors, boosting EQ, and pushing plugins to the max—only to end up with a muddy, distorted mess, I feel your pain. We’ve all been there. You listen back and think, Why does the commercial stuff sound so clean, open, and punchy, while mine sounds stuffed and harsh?
Most of the time, the bottleneck isn’t your microphone, your interface, or even your mixing plugins. It’s your gain staging.
In the digital audio workstation (DAW) era, it’s dangerously easy to ignore levels. We slam audio files straight into plugins at blazing-hot levels, push faders up until the meters glow angry red, and wonder why our mixes fall apart.
If you want your rap vocals to cut through the mix without sounding digital and clipped, you need to master gain staging. In this step-by-step tutorial, we’re going to walk through how to gain-stage your rap vocals before mixing to preserve clean headroom, protect your dynamics, and set your tracks up for a truly professional sound.
What Actually Is Gain Staging (And Why Do Rap Vocals Suffer Without It)?
Back in the analog days of hardware mixing consoles and outboard gear, sound engineers had to be very careful with levels. Gear was engineered to perform best at specific, optimal operational levels—often referred to as “sweet spots.”
When software developers design modern analog-modeled plugins (like vintage compressors, tube EQs, or tape saturation), they code them to behave exactly like their hardware ancestors. If you slam an analog-modeled compressor with a vocal track that is peaking at -2.0 dBFS straight out of the gate, you aren’t just driving the plugin—you’re choking it. The plugin clips internally, your transients get squashed into oblivion, and your mix loses its punch.
By learning how to gain-stage your rap vocals early in the process, you achieve a few massive wins:
-
No more digital clipping: You eliminate unwanted distortion at the source.
-
Happier plugins: Your EQs and compressors get the breathing room they need to do their jobs naturally.
-
Better balance: Your vocals sit comfortably against the instrumental instead of fighting for dominance.
-
Mastering-ready headroom: You leave plenty of space on your master bus for the final polish.
Let’s dive into the step-by-step workflow to get your session locked in.
The Step-by-Step Tutorial: How to Gain-Stage Rap Vocals
You don’t need expensive gear to fix your levels; you just need a disciplined workflow. Here is the exact process to get your rap vocals sitting right before you start reaching for creative plugins.
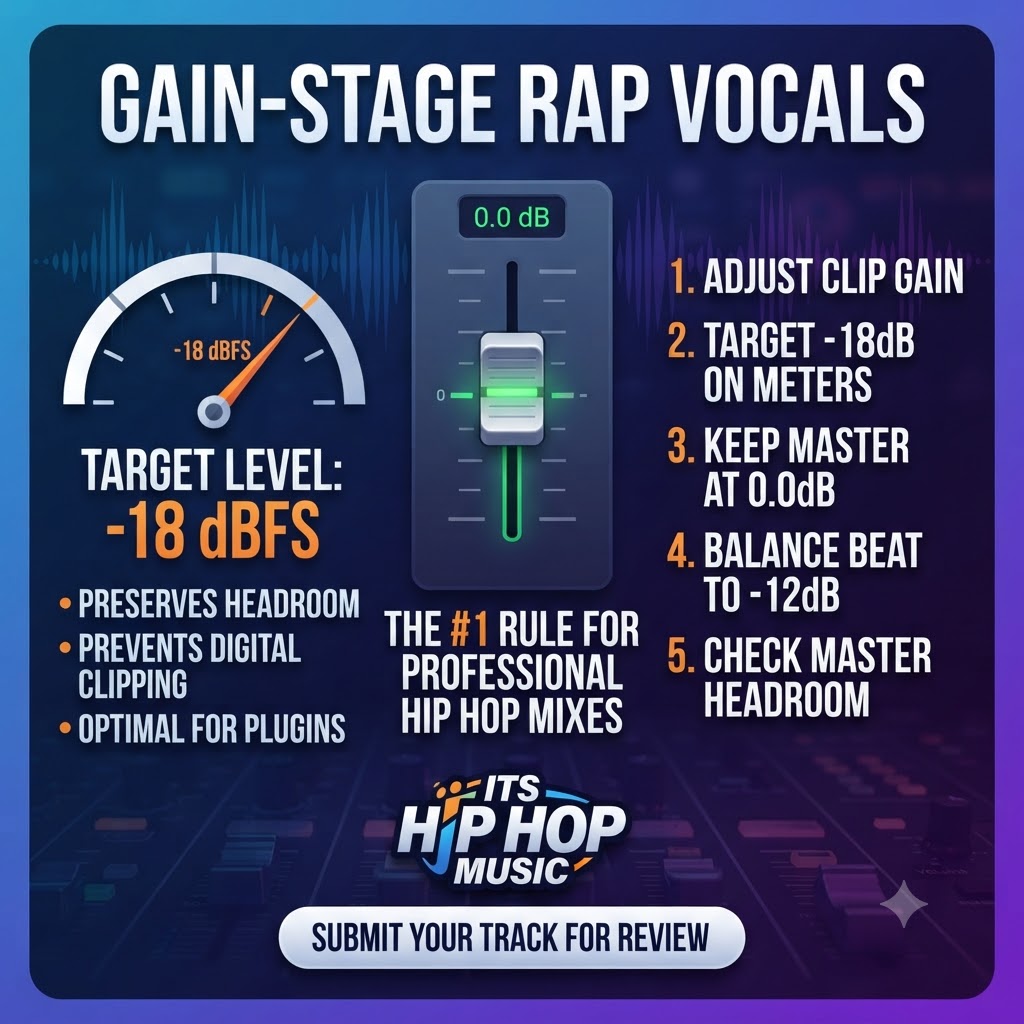
Step 1: Adjust Clip Gain (Before You Touch the Faders)
Before you even think about moving a single volume fader or dropping a plugin onto your vocal channel, look at your raw audio files. Select all your vocal clips across your timeline and open up your DAW’s Clip Gain or utility tool.
Raw vocal recordings are often wildly dynamic—verses might be quiet, ad-libs might be loud, and hyped hook sections might be clipping the meter. Use clip gain to tame those wild peaks at the source level before they ever hit your channel strip or your first insert plugin.
Step 2: Target -18 dBFS on Your Channel Meters
Now, loop the loudest part of your song (usually the hook or your most aggressive verse) and watch your channel meters.
Your goal here is to adjust your clip gain so that your peak vocal levels hover smoothly around -18 dBFS. Why -18? Because it represents the digital equivalent of 0 VU on analog gear—the sweet spot where most third-party plugins are calibrated to operate at their absolute best. Your vocals might look a little “quiet” on the meters compared to what you’re used to, but trust the process. Your plugins will thank you later.
Step 3: Lock Your Master Fader at 0.0 dB
Here is a common rookie mistake: mixing a track that’s too loud by simply pulling down the master fader.
Don’t do it. Ensure your master fader stays set at 0.0 dB throughout the entire mixing process.
Controlling your audio levels at the individual track, bus, and clip level—rather than trying to mask a broken mix balance with the master fader—is the defining habit of a professional mix engineer. If individual elements are too loud, turn them down at the source or the channel fader, but leave that master fader untouched.
Step 4: Balance Your Instrumental Around -12 dBFS
Once your lead vocals, double tracks, and harmonies are sitting nicely around -18 dBFS, it’s time to bring in your beat.
Instead of building your mix around a blazing-hot instrumental track, balance your beat volume so it sits comfortably around -12 dBFS beneath your vocals. This leaves roughly a 6 dB gap between your vocals and your instrumental, giving your rap vocals all the sonic real estate they need to sit front and center. Your vocals will punch through the kick, snare, and 808s naturally without needing aggressive, destructive compression.
Step 5: Verify Your Master Bus Headroom
Before you call your mix finished or hand it off for mastering, take a close look at your master bus output meters.
Check that your master bus maintains at least 6 dB of clean headroom before mastering. When you have 6 dB of headroom, your final limiter isn’t working overtime just to keep up with a squashed mix. Your transient details survive, your bass stays fat, and your song retains its dynamic energy.
Bring Your Vision to Life: From Raw Mix to Industry Standard
Mastering gain staging takes time, patience, and practice. But once you build it into your daily recording and mixing habits, you’ll notice an immediate shift in the clarity, depth, and overall professionalism of your music.
When your track is polished, balanced, and sounding massive, don’t keep it sitting on your hard drive. Share your work with the world, publish your gain-staged, radio-ready records, and explore professional review options via our music review portal.
📦 Secure Your Slot: Music Review & Promotion
Are you an independent artist looking to cut through the noise and get your latest release in front of thousands of dedicated music lovers, fans, and industry tastemakers?
its HIP HOP music is proudly recognized as one of the best indie hip-hop blogs online, dedicated to championing underground talent and giving fresh releases the spotlight they deserve.
-
Standard Music Review: Available for a simple $20 one-time payment. Just fill out our quick submission form, and your review will go live within 7 days so you can track the buzz.
-
Featured Section Upgrade: For just an extra $25 one-time payment, you can upgrade to our Featured section. This tier includes 5 full days of dedicated social media promotion plus direct inclusion in our weekly newsletter sent out to thousands of active hip-hop enthusiasts.
Find the right editorial write-up option for your latest release and secure your slot today via our Music Review Portal.